Bitcoin Wallet
You want to create a Bitcoin wallet, but don't know where and how?
Here
you
will
learn
step
by
step
how
to
create
a
Bitcoin
wallet
and
how
you
can
receive
and
send Bitcoin quickly and easily.
With your personal wallet, it is important that only you have the private key to access your coins anytime, anywhere.
Before you go ahead and buy Bitcoin, you should create a personal wallet where you can safely store your Bitcoins.
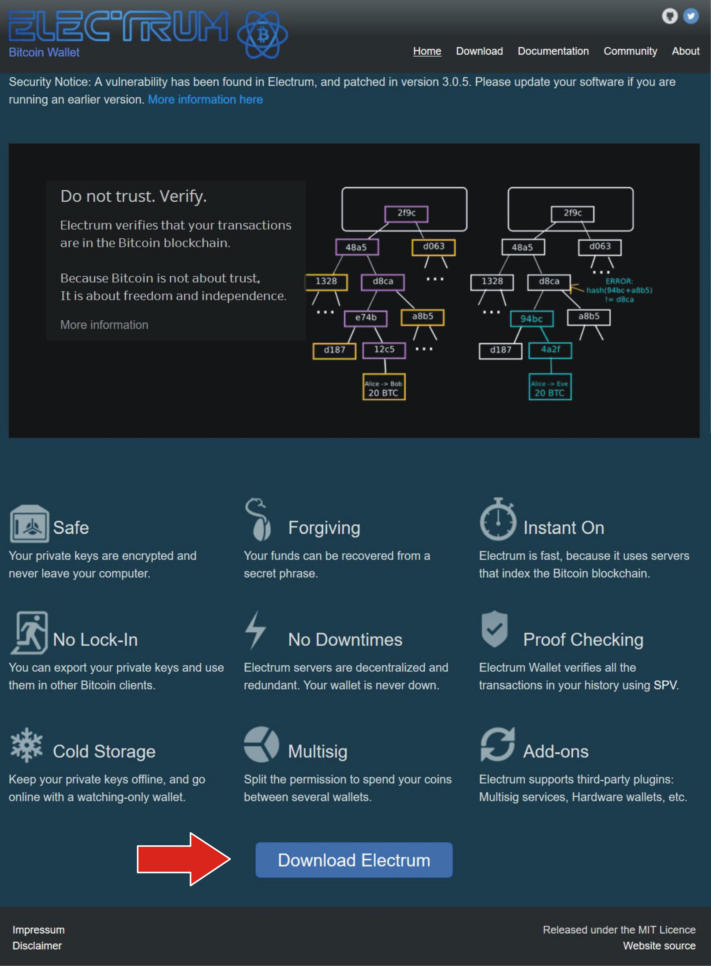
To create your Bitcoin wallet ......
Then click on "Download Electrum
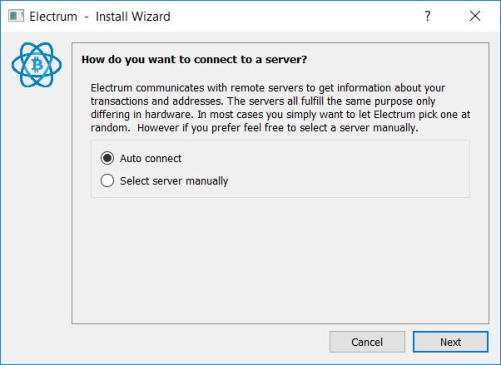
Do not change anything in the "Auto connect" setting, simply click on "Next".
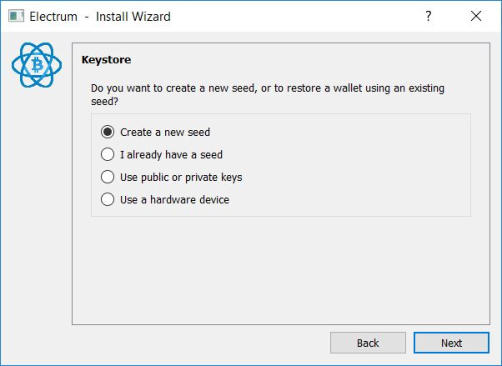
Select "Create a new seed" and click on "Next".
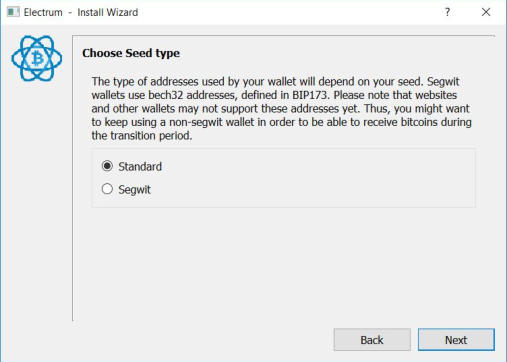
The type of addresses used by your wallet depends on your seed. Segwit wallets use the Bech32
addresses defined in BIP173. Please note that websites and other wallets may not yet support these
addresses. Therefore, you should use a non-segwit wallet to be able to receive bitcoins during the
transition phase.
So here, first use the "Standard" variant and click on "Next".
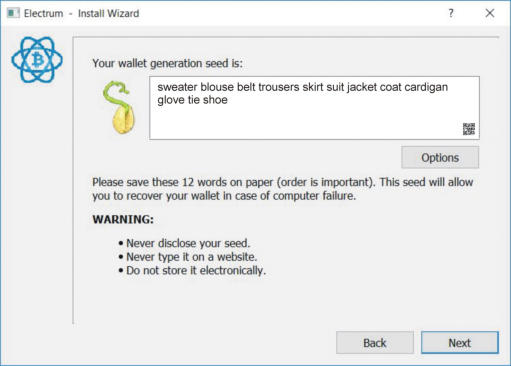
Your seed for your Bitcoin wallet appears in the next window.
It is imperative that you keep these twelve recovery words safe and secure for all time, as these are
your most important data for accessing your funds or recovering your wallet at any time. Keep this
data in a safe place that only you can access.
Once you have done this, then click on the "Next" button.
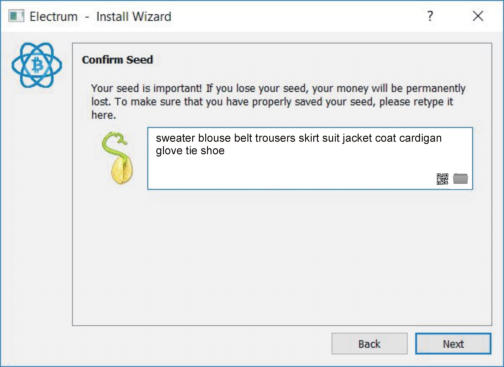
The following window will appear:
Here you enter the twelve words that you previously wrote down on a piece of paper.
When you have done this and click on "Next", you will be taken to the next window:
Enter a very secure password here and repeat it.
If you now click on "Next", the installation process is finished.
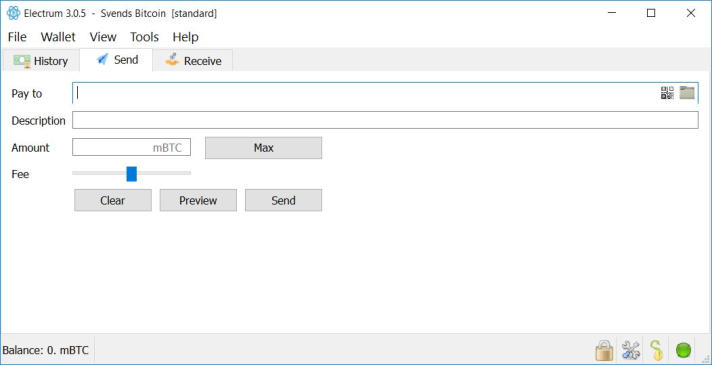
Now open the Bitcoin Wallet and you will get to the following interface:
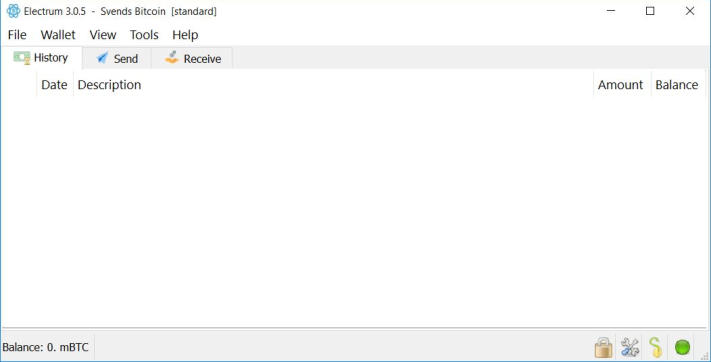
That's really all there is to it. The rest is self-explanatory:
Under History you can see your previous transaction history.
If you click on the "Send" button, you can send bitcoins to other addresses.
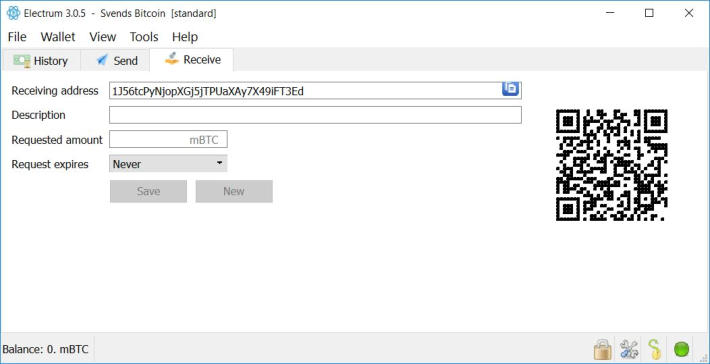
If you click on the "Receive" button, you will see your received Bitcoins,
You will also find your receiving address and the corresponding QR code.
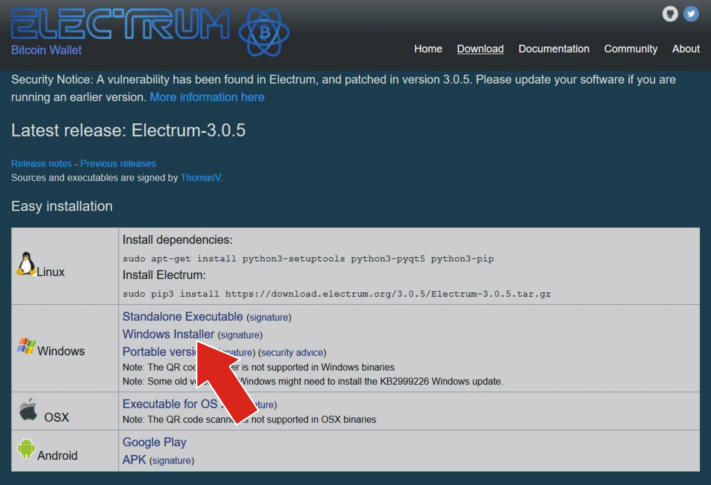
In the next window, select the file "Windows Installer".
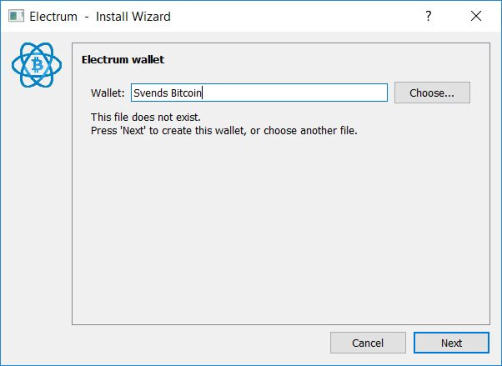
Here you can give your wallet a name. Then click on "Next".
You need the receiving address if other participants or you yourself want to send bitcoins to this
wallet.
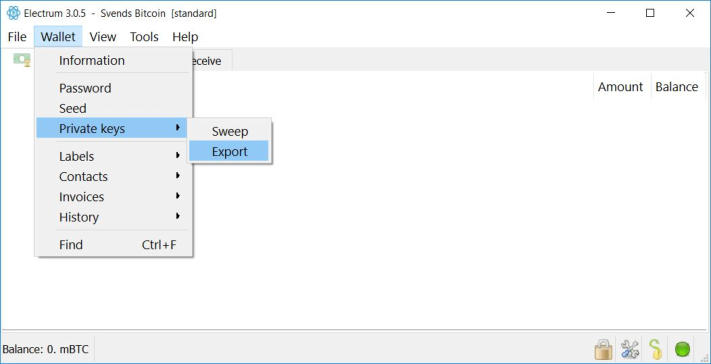
In the next step, I strongly recommend that you back up your private key. With the private key, you
can restore your wallet in an emergency if your computer or hard drive breaks down for some
reason.
To do this, proceed as follows:
First click on the "Wallet" button, then on "Private keys" and then on "Export".
The wallet will now generate your private keys. In the next step, you have to choose whether you
want to download the keys in CSV or JSON format. Since the JSON format is the most common
format, I recommend using this format.
It is important that you keep the private keys safe and secure for all time, as these are your most
important data for accessing your credit at any time. Keep this data in a safe place to which only
you have access.
I hope I have been able to provide you with a guide that will make it easier for you to create and
use the Bitcoin wallet. If you still have any questions, please contact me.
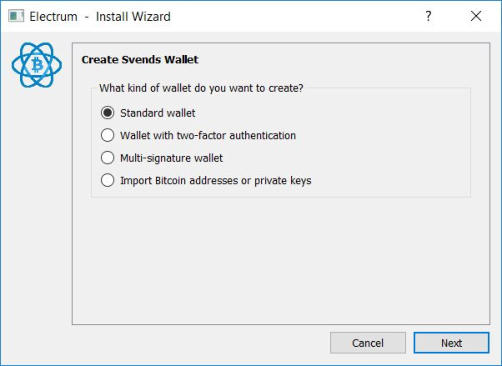
The "Standard wallet" is preset in the setup. You can leave this as it is, as the standard wallet also
contains all the important functions. The "Multi-signature wallet" is somewhat more secure due to its
2-factor authentication, but is also subject to a fee. Now click on "Next" again.
Since this is probably your first Bitcoin wallet, you first need to create a seed.

In the next step, click on "Save file" and save the file in a folder of your choice.
in a folder of your choice.

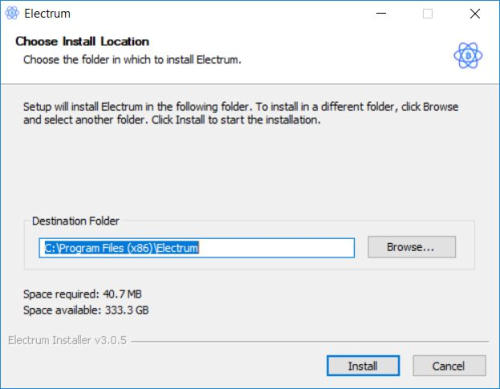
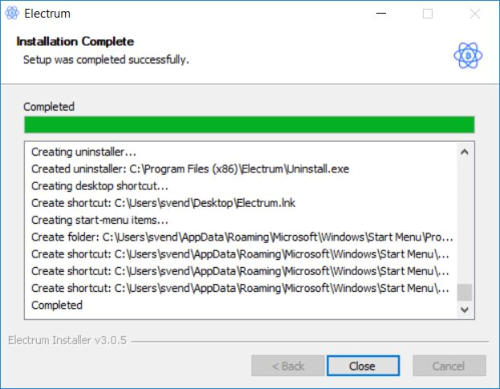
Then execute the .exe file and follow the installation instructions.
Attention: The most secure solution to store cryptocurrencies is always a hardware wallet. These so-called electronic wallets
have a very big advantage over online or desktop wallets, namely really only you know and possess the private key. You can find
more information on this topic and the comparison test of the different hardware wallets here:


Wallets


Please switch
to the desktop version,
for instructions on how
to set up a wallet.
Wallet